
In this article 11 sections
- How much salt do you need for winter gritting?
- What should you do before the first frost?
- What should you do the evening before a forecast frost?
- What should you do on the morning of a frost?
- What should you do when snow is forecast or already lying?
- What should you do after the thaw?
- What do most people get wrong about gritting?
- Is brown or white salt better for a site?
- Can salt damage paving, plants and floors?
- Do and Don’t
- What kit should be ready before the first frost?
How much salt does a path need, when should it go down, and why does a gritted car park still freeze? This practical winter gritting guide covers spread rates per square metre, how many bags a site uses in a season, what to do the evening before a frost and on a snowy morning, brown or white salt, and the mistakes that leave treated paths icy.
Rock salt does not melt anything while it is dry. It has to dissolve first, and that takes moisture, time and some foot traffic, so the time you spread it matters as much as the amount. The rates in this guide are based on UK winter road and footway guidance. Treat them as a starting point and adjust them to your own surfaces.
How much salt do you need for winter gritting?
For a small path, a tablespoon of salt for each square metre is enough. For larger areas, work in grams per square metre. Spreading to stop ice forming takes 10 to 20 grams per square metre. Spreading on ice or snow that is already there takes 20 to 40 grams.
| Situation | Rock salt per square metre | Area one 10kg bag covers |
|---|---|---|
| Preventing frost on a footway | 10 to 20 g | 500 to 1,000 m² |
| Melting ice that has already formed | 20 to 40 g | 250 to 500 m² |
| Snow forecast, or rain followed by a freeze | 20 to 40 g | 250 to 500 m² |
| After clearing snow, to stop what is left compacting | 20 g | 500 m² |
A 10kg bag is 10,000 grams, so the area it covers is 10,000 divided by the rate in grams.
Three things push the rate up. The first is a colder surface. Ten grams per square metre stops a thin film of water freezing down to minus 2.4°C, and 20 grams takes that down to minus 5°C. Below about minus 7°C salt works much less well, and in dry air the limit is closer to minus 5°C.
The second is a wet surface. The same 10 grams protects a 0.25mm film of water down to minus 2.4°C, but a 0.5mm film only down to minus 1.2°C. More water dilutes the salt, so push standing water towards the drain before you spread.
The third is a quiet route. Salt dissolves faster where feet and wheels break up the grains, so road gritters add about a quarter to their rate on lightly used roads. A side path that few people walk needs more salt than the main entrance.
A thin layer is hard to judge by eye, so weigh it once.
Mark out one square metre on a path, weigh out the amount for your chosen rate, spread it and look at the result. Then weigh what your scoop holds, so the team can repeat the same amount without a scale.
How much salt will you need for the whole season?
Multiply the area by the rate and by the number of treatments. A site with 400 square metres of walkways, treated at 20 grams per square metre, uses 8kg each time. Twenty treatments is 160kg, which is 16 bags of 10kg. The number of treatments is the part you have to estimate. Councils in the North of England treat their priority roads anywhere from about 20 times in a mild winter to over 40 in an average one. Count last winter’s frosty mornings from your own log, work from that number, and keep a few spare bags for a cold spell.
What should you do before the first frost?
Walk the site and measure it
Walk the site in daylight and list the routes people use every day. These usually include the main entrance, the route from the car park, ramps and steps, the bin store and the loading area. Note the spots that stay in shade, sit at the bottom of a slope or collect water, because they freeze first. Melted snow can also run across a clear path from higher ground and freeze again overnight.
Measure each route in square metres, length times width, and add them up. Every calculation in this guide starts from that total. Clear leaves from drains and channels at the same time so meltwater has somewhere to go. Our guide to how to prepare a building entrance for winter covers the entrance checks in more detail.
Store the salt so it stays usable
Rock salt takes moisture from the air, even under a roof, and damp salt sets into lumps that will not spread evenly. Salt stored in the open also needs a higher rate, around 15 to 20 grams per square metre for frost instead of 10. Keep bags closed, off the ground and in a dry store, and use opened bags first. Keep the store a few metres from hedges and trees, because salt that leaks from bags gets into their roots.
Prepare the team
Agree who checks the forecast each afternoon, who spreads, who puts out signs and who walks the routes in the morning, and name a cover for weekends. Road gritters go out when the surface is forecast to drop below plus 1°C, not zero, so a night forecast close to freezing is already one to act on. Show every spreader the measured square metre so they can see the right amount on the ground, and tell them where salt must not go, such as planting, grass and newly laid paving.
Check the winter kit now. Hi-vis, waterproof gloves and warm boots should be issued by size and tried on, so everyone has a pair that fits. Start a simple gritting log with the date, the time, the areas treated and the number of bags used. After one winter it tells you how much salt your site really needs.
What should you do the evening before a forecast frost?
Spread in the evening, before surfaces fall below 0°C. Salt needs time to turn into brine, and salt spread on a path that has already frozen starts working only after ice has formed.
- Sweep leaves and standing water off the routes and towards drains.
- Work out the area and the rate, then take that much salt out and leave the rest sealed.
- Treat the priority routes first, then ramps, steps and shaded spots.
- Walk at an even pace and scatter in a sweeping arc, so the salt falls in a thin layer. A spreader gives a more even layer than a shovel and leaves fewer heaps of salt on concrete.
- Keep salt off planting and grass, and sweep stray grains back onto the path.
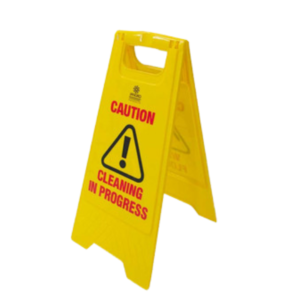
- Put out wet floor signs inside the door, where meltwater and salt will be walked in.
- Write the time and the amount in the log.
Rain after spreading thickens the film of water and dilutes the salt, so it protects to a higher temperature than you planned for. If rain is expected before the freeze, plan a second pass after it stops.
What should you do on the morning of a frost?
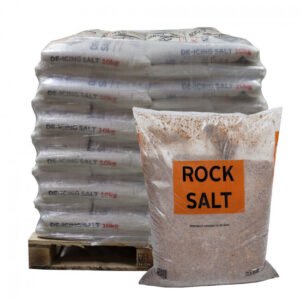
Walk every route at the start of the day. Brown De-Icing Salt stays visible on the surface, so the untreated stretches show up. Where ice remains, spread 20 to 40 grams per square metre and give it time before adding more, because salt needs time to dissolve and foot traffic speeds that up.
A dry, cold morning is the one people miss. When the air is dry, the wind is up and few people have walked the path, salt takes up moisture very slowly and the grains can lie on the surface without doing anything. Ice can form on a treated path in those conditions. If the path and the air are both dry, check it twice and spread more where few people walk.
Check again at midday and in the late afternoon. Snow and ice that melt during the day run across the site and freeze again once the light goes, so one morning round is not enough on a day that thaws and then turns cold.
What should you do when snow is forecast or already lying?
Salt before the snow starts. Salt that is down before snow settles melts the first fall and leaves a wet layer underneath, so the snow that follows does not stick to the path and is easier to clear.
Once snow is lying, clear it before you salt. Salt cannot deal with depth. Even 40 grams per square metre only handles a light dusting at minus 2°C, and anything deeper needs a shovel first.
- Clear early in the day, because fresh loose snow is easier to move than snow packed down by feet.
- Make a path down the middle first, then shovel from the centre to the sides.
- Put the snow where it does not block paths, drains or planting.
- Spread salt on the cleared area before nightfall.
After each clearing pass, spread salt at about 20 grams per square metre to stop what remains from packing down. If hard packed snow or ice has formed, repeat treatments at 20 to 40 grams per square metre. Salt on packed snow can leave an uneven, slippery surface as it melts in patches, so add sand or grit there for grip.
What should you do after the thaw?
Sweep up spent grit before the rain washes it into drains and gullies, where it settles and blocks them. Brown salt leaves a layer of fine grit and clay on the surface, so sweep entrances and thresholds carefully, then check drain covers and channels. Put leftover salt back into a sealed bag. Compare your log with the amount you planned for, and reorder before the next cold spell.
Look at the paving and planting while the weather is mild. Flaking on concrete and browned leaves near treated paths show where too much salt went down this winter and where to use less next time.
What do most people get wrong about gritting?
Salt melts ice the moment it lands. It does not. Dry rock salt starts working only once it dissolves in water from the surface or the air, and that takes time, which is why the evening is better than the morning.
More salt is always safer. Salt beyond the rate the temperature and the surface need does no extra work. It stays on the surface, gets walked indoors and soaks into concrete, where it shortens the life of the surface.
Salt works in any frost. It works much less well below about minus 7°C, and below about minus 5°C in dry air. In that weather, add sand or grit for grip alongside the salt.
Hot water clears ice quickly. It melts the top layer, then the water freezes again into thin, clear ice that is hard to see and more slippery than before. Use salt or sand instead.
Gritting after the snow is as good as before it. Salt that is down before the snow leaves a wet layer underneath. Salt spread on packed snow needs several treatments to break it up.
The salt bin on the street is there for everyone. Council bins are filled to keep public roads and pavements clear, so a site needs its own stock.
Is brown or white salt better for a site?
Both melt ice. They differ in what they leave behind.
| Brown rock salt | White salt | |
|---|---|---|
| Salt content | About 92 to 95% | About 99.5% |
| Grit and clay left behind | About 2 to 5% | Under 0.1% |
| Visible on the ground | Yes | Hard to see |
The grit in brown salt adds grip underfoot and shows which stretches have been treated, but it leaves a brown residue that gets walked indoors. White salt leaves almost no residue, but it is hard to see where it has gone down, and because it is purer the rate can be slightly lower. Brown salt suits car parks, yards and service routes where grip and visibility matter most. White salt suits entrances and clean paving.
Can salt damage paving, plants and floors?
Yes. The damage depends on how much salt is left behind and how often the surface freezes and thaws.
Concrete flakes and wears sooner when salty water soaks in and freezes inside the surface. New or freshly repaired concrete is the most at risk, so use sand or grit for grip on it until it has fully cured. Block paving also suffers more frost damage when salt is used. If you do not know the age or make of a paved area, ask the supplier or installer before you salt it.
Plants take damage from salt spray and from salt that drains into the soil, and it shows as browned leaves and dieback the following spring. Keep salt off beds and verges, and do not pile salted snow onto them.
Indoors, brown grit and salty water are carried in on shoes. Matting at the entrance, signs while floors are wet and regular sweeping of thresholds keep most of it outside.9:10 PMImpact Support Solutions
Do and Don’t
| Do | Don’t |
|---|---|
| Spread in the evening, before surfaces fall below 0°C | Wait for ice to form before you start |
| Clear snow first, then spread salt on the cleared surface | Salt over deep or packed snow |
| Measure the amount per square metre and spread it evenly | Tip salt from the bag in heaps |
| Keep bags sealed, off the ground and in a dry store | Leave bags open or standing on wet ground |
| Spread more on quiet routes, shaded spots and slopes | Use the same amount on every route |
| Add sand or grit for grip in very hard frost | Rely on salt alone below about minus 7°C |
| Check the routes again at midday and late afternoon | Assume one treatment lasts all day |
| Keep salt off planting, grass and newly laid paving | Pile salted snow onto beds |
| Sweep up spent grit once the thaw has finished | Leave it to block drains and be walked indoors |
| Use salt or sand on ice | Pour water, hot or cold, on snow or ice |
| Keep the log and count the bags used | Guess next year’s stock from memory |
What kit should be ready before the first frost?
The salt comes first. Brown De-Icing Salt 10kg comes in a bag sized for hand or scoop spreading on paths, entrances and yards. A Wet Floor Sign, A Frame marks slushy entrances while the grit takes effect, and a Wet Floor Sign 3ft Cone works at doorways and in corridors.

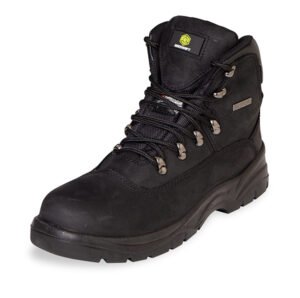
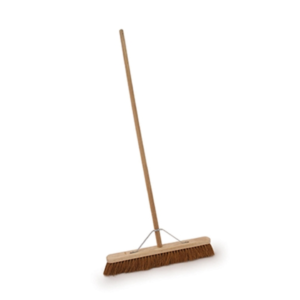
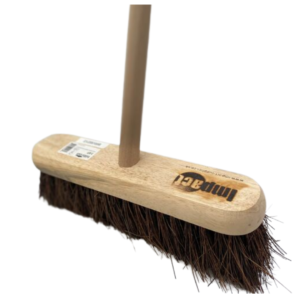
For the team, the Hi-Vis Coat comes in orange or yellow, in sizes small to XX large, for yard and gritting work. Waterproof Thermal Nitrile Gloves come in Medium to XX Large, and the Black Thinsulate Safety Boot is a warm safety boot for winter duties. For the clean up, the 24 inch Soft Sweeping Brush covers large areas in fewer passes and the 12 inch Stiff Brush lifts grit from rough yard concrete. An Ice Window Scraper belongs in each vehicle.



Salt and kit can be ordered from the Impact Support Solutions shop for collection from our Liverpool trade counter or standard delivery. Order before the first frost is forecast, because that is when everyone else orders too.